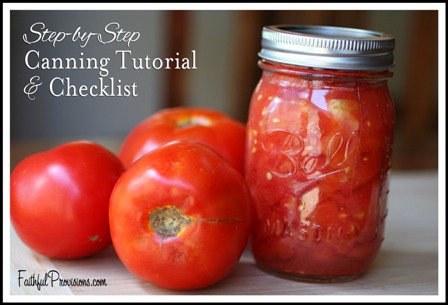
Hot water bath canning is not nearly as hard as I had imagined. The trick to canning is planning. And I love to plan, so this was a good fit for me! Last weekend I attended a canning class and got some great tips from a master canner. Plus, I thought it might be helpful for those of you who have never canned before to literally see every single step involved and the best way to plan.
*Scroll down to download free printable canning checklist.
Pressure Canning versus Water Bath Canning
Pressure Canning versus Water Bath Canning: I always wondered why you would do a water bath versus having to use a pressure cooker. Well, there is one big reason. It has to do with the pH and acid level of the foods. Here is what I learned:
Water Bath Canning is best for tomatoes and other acidic foods like pickles, jams, jellies, and fruits. They have a high acid level and therefore do not need to be heated above 212 degrees (the temperature at which water boils). However, if you are going to be canning salsa or tomato sauce, you MUST use a tested recipe. Ingredients that go into the salsa for instance, like onions and peppers, have a low acid level and technically should be processed using a pressure cooker. The trick for many would-be canners is finding a canning recipe you like, that fits your taste, because you CANNOT alter the recipe at all. It is tested for the proper pH/acid levels to prevent bacteria and microbes from growing. If you change anything, it can change the chemistry, and that could create a perfect environment for those pests!
Pressure Cooker Canning is used for low acid foods like green beans, potatoes, onions, and most vegetables. There are canners that include a dial and a weight. According to my canning instructor, the weight is just something you have to learn, so it seemed to me to be much more subjective and I would stay away from it. But the dial is more expensive and you should have the dial tested every 2-3 years. Pressure cookers can reach higher heat levels like the 240 degrees needed to kill botulism, and that is why it is necessary on low acid foods. These are great to find at garage sales because they can run over $100. If you find one at a garage sale you should be able to get it for around $15-20, so be sure to check for the following: good sturdy handles, easy to get lid on and off, and tightens down well.
Why Use a Hot Water Bath Canner?
Why use a hot water bath canner? The reason you want to use a hot water bath canner instead of just your stock pots in your kitchen is because they are wider, so you can fit more jars in. Plus, they’re deeper, so you can keep the water level over the jars. From my experience, the more jars you fit in, the less time you will spend with this process. You spend about 30-40 minutes for each batch, and most hot water bath canners will hold up to seven jars. So, you can greatly reduce your time by using these. Usually you can find them at Walmart or on Amazon for around $25 – $40. Check out garage sales and your grandmother’s house too.
Canning Tomatoes at Home
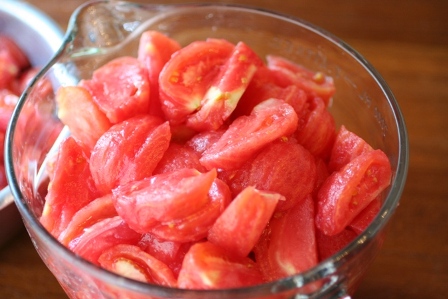
Canning tomatoes at home is easy. It’s probably the easiest of all. The difference in canning tomatoes is that you will need the extra step of blanching to remove the stem. Then it’s up to you whether you leave them whole or dice them. I dice them so that I can use them in soups, salsas, sauces, and the work is already done.
Tips for Canning
- Have all supplies ready before you start. If you get into canning and find you forgot something, depending on what it is, you could have to start the entire process over from scratch. Canning is about the process, it is all about timing, so you don’t want to be interrupted.
- If you don’t have a rack for your water bath pot, use screw bands or a towel on the bottom to prevent clanking and to keep the jars off the bottom of the pot.
- Wide mouth jars are easier to can with.
- Inspect all jar rims before starting. You want smooth rims with no nicks or gaps. This will guarantee a good seal.
- Salt is optional when you are canning things like tomatoes and green beans. It is for taste and is usually optional.
- Have a tea kettle filled with hot water during processing if water levels drop. This keeps the boiling up and you won’t need to add to the processing time.
- After processing, place hot jars on a towel, or a cooling rack covered with a towel. NEVER sit hot jars on a cold surface–they will break!
- Guaranteed seal? If you don’t hear all the pops, you can touch the top and if there is no give (concave) they are sealed.
- Slow Cool – To create the best seal, place hot jars into a box and cover with a towel. This slows down the cooling process and helps create a better seal.
- Unsealed jars – Any jars that don’t seal properly can either be eaten immediately, put in the refrigerator, frozen, or you can re-can. If you choose to re-can, you must start from the beginning.
- Label all jars after 24 hours once they have cooled. Store in a cool, dark place.
- All jars must be sealed within 24 hours or you will need to restart the process on those that do not properly seal.
- DO NOT leave the house while jars are processing. The jars must be at a rolling low boil with water level above the jars to properly process. If you are in the kitchen, you can more easily see if this process stops. My burner went out because the water was overflowing and if I had left would have had to start over!
Ball Canning Jars
Ball canning jars with the wide mouths are the ones I prefer for a couple of reasons. I can usually find coupons for them and stack those with a sale. In fact, I was able to do just that at my grocery recently, snagging them for $6.50 a case after the store sale and my coupons. You can also find them at garage sales and thrift stores. I would recommend looking for a rock-bottom price of $.50 per jar. Also, I prefer wide-mouthed jars because they are easier to fill, and I think they look prettier too! I even use my empty jars as drinking glasses at home.
How to Can Food in Jars
How to can food in jars is about to get much easier with this step by step list. If you can follow these instructions, you are on your way to learning how to can.
Step by Step Processing
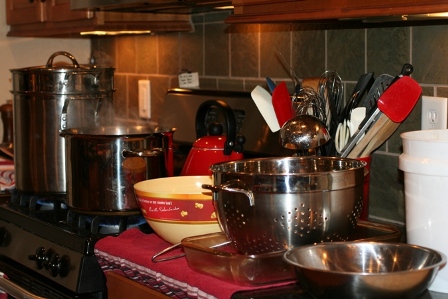
1. Gather all supplies you will need. Download the Canning Supply Checklist HERE.
2. Fill 2 water baths (for more cans to process at one time), blanching water and a tea kettle, start boiling. Fill small sauce pan with lids and sit on the back burner to start later. Depending on the size, it can take up to 45 minutes to get a rolling boil.
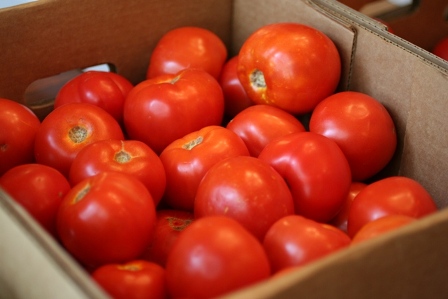
3. Sort and inspect all tomatoes. Clean and set them aside.
4. Create blanching assembly line in order below:
– boiling water for blanching (this can be your water bath for processing)
– cold water bath (with ice)
– peeling bowl (slop bucket)
– whole tomatoes peeled bowl
– chopping board
– final tomatoes bowl
5. Put jars and screw bands into the dishwasher on the rinse cycle. Take lids and put them into a small sauce pan covered with water and put on medium heat on your back burner.
6. Blanch and prepare tomatoes.
– Drop in boiling water for 3 minutes using a spoon to gently drop them in the hot water.
– Remove and place in a cold water bath, which is just cold water and ice for a few minutes. (This is to stop cooking process.)
– Core tomatoes and peel off skin, place in a large bowl (whole tomatoes peeled bowl).
– Dice or quarter tomatoes and put into a final bowl for prepared tomatoes.
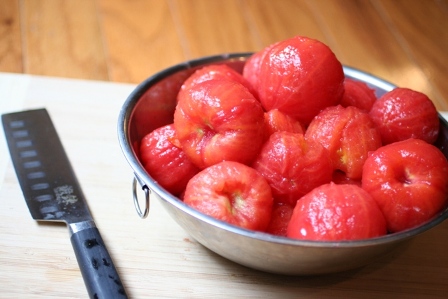
Once the blanching process is complete, set tomatoes aside, and remove all supplies in assembly line. You will clean up later once the jars are processing.
*Tip: You can use the water for blanching as the same pot for processing the jars.
7. Set up assembly line for filling and processing jars as follows:
– Hot Water Bath with rack (water should be boiling before you begin)
– Towel for laying out empty hot jars to be filled
– Towel to lay all utensils, you will need: magnet for lids, jar grabber, funnel, ladle, stir, measuring spoon, lemon juice, clean rag to wipe rims
– Prepared tomatoes bowl
8. Fill jars and process:
– Place funnel in jar mouth and fill each jar with tomatoes 1/2 inch below ribbed jar lines (below jar shoulders).
– Measure out 2 teaspoons of bottled lemon juice per pint jar (2 tablespoons for quart jars)
– Using tea kettle (hot water) fill with hot water up to first line above jar shoulders, first rib.
– Take stir and make sure there are no air bubbles in the jar. Recheck tomato level, they can drop if there are air bubbles and you can add a little more liquid or tomatoes depending on the space left.
– Using a clean dry rag, clean the rim of each jar carefully. If you don’t have a clean rim, you will not get a good seal.
– Remove lids from hot water with magnet and place on each jar.
– Gently apply screw lids, only until it is comfortable and stops turning, not tight. They need room to expand a little, and a little loose is fine.
– Once water is boiling, using jar grippers, pick up jars and place them gently in water bath. Water level will rise with each jar you add.
– Make sure water level is above the top of the jars, just enough to cover.
– If not, add tea kettle water, and wait for a rolling boil before putting on the timer.
– Boil according to recipe directions, keeping an eye on water bath every 10 minutes.
– Set one timer for full time and use second timer to check every 10 minutes.
– Once jars have processed in hot water bath for time alotted, remove using jar gripper.
– Place hot jars on a towel, or a rack covered with a towel to cool.
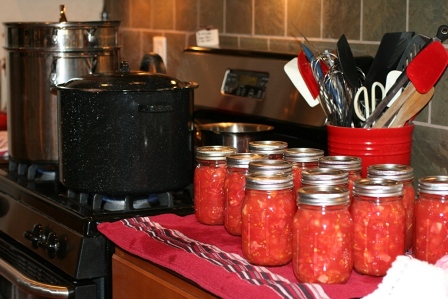
– You will hear popping over the next 24 hours. If you miss popping, you can easily tell if sealed if it is concave and there is no give in the lid.
*Tip: While jars are processing either begin second batch of tomatoes or clean up blanching station. I HIGHLY recommend you stay in the kitchen while jars are processing in case the burner goes out or the water level drops. If either of those happen, you will have to process for full time, which is best if you don’t know when the boiling stopped. If you are in the kitchen you will have a better idea of when the boiling stopped and can adjust accordingly.
:: Download FREE Supply and Step by Step Check list HERE


I’m curious to know where you took your canning class. Last year was the fist year that I tried canning. I made lots of bread and butter pickles and they turned out great. This year I plan to can lots of tomatoes as it looks ike we will have a bumper crop. I’d love to learn to pressure can, but it just intimidates me so much. I’d love to take a class to learn how.
Mine was offered up as part of my CSA share.
Ok so I have seen you talk about CSA what is it. Oh and thank you for the canning tutorial. I have wanted to can but have been scared.
“CSA” stands for Community Supported Agriculture. You pay a price to own a “share’ of a farm. Our is an organic farm and I get a big box every other week. It is wonderful! You eat what is in season and what the farmer is growing. 🙂
I’m canning my own jams, but I thought that I would have to use a pressure cooker if I wanted to can tomatoes…glad that’s not the case!! I can’t wait to give it a try! And you’re definitely right about making sure there are no interruptions. I have 4 little ones, so I usually end up starting the canning process after my kids go to bed, and I’m up until midnight trying to finish. A few nights ago, we had a bad hailstorm and I burned a big batch of jam because I walked away for 5 minutes to see the action! I’ve learned my lesson!
I actually use the weight versus the dial. I grew up around canning so I was familiar with the process, but I’ve never had a problem with the weight system.
I also can my own chicken broth (with the pressure cooker) whenever I find chicken on sale. It keeps really well, and is deep and flavorful. This frees up some space in my deep freeze so I can freeze more veggies!
Priscilla, I might have to attempt that so I can can my broth! I would love to do it that way. 🙂
I would love to can. I once read that you can’t do it on a glass top stove. Have you heard anything about that?
I read on the bottom of the case of jars that I bought today that you cannot use a glass top stove due to the size of the bottom of the 21 quart canner. I think the bottom would extend past the typical burner and cause the surface to crack. I have a gas stove and it worked very well with that pot.
I also read that, and don’t dare use my glass top (I know some people do and haven’t had problems.. but I can’t bring myself to try). I bought a dual electric burner from amazon (search for Waring SB30 or DB60) – it works really well to have the additional burners, and was relatively cheap piece of mind for $80! The single burner is only $50 and in hind-sight would have been sufficient and taken up less counter/storage space.
Thank you Rox! I hadn’t thought about getting an electric burner for canning. Thats a great idea! I’ll look into them. I don’t want to ruin my glass top either. I love it and the only time I’ve ever run into a problem is when I started learning to can and found out it was not recommended for glass tops.
I too have a glass top stove. What I have done is take the water bath canner out on the patio and use the side gas burner on our grill. Like a summer kitchen our Grandmothers would have used. All the heat and water mess is outside. Great for clean up too!
Thank you for the tutorial on canning tomatoes. It was very well written and extremely helpful. When I got nearly to the bottom and was ready to fill the jars with the tomatoes, I realized that I needed a bit more guidance as to what “headspace” is and exact processing times for the elevation I live in. I found a site recommended by the Ball company- http://www.FreshPreserving.com
Between the 2 of you, I have lids popping in the background as I type. Music to my ears.
I am so glad it was helpful! Thanks so much for letting me know. 🙂
It’s my first time to try canning tomatoes and I have been told that you need to add salt to the jar of tomatoes, did they say you don’t need salt if adding the lemon juice?
Mary, salt is ONLY for taste, I omitted mine. But the lemon juice is necessary for the acidity level to prevent microbes from forming. Hope that helps!
Hi Kelly,
Do you know if you cn re-can already sealed jars of salsa? Ours didn’t turn out spicy enough and I was hoping I could add hot peppers, boil and process again? Thoughts?
Thank you!
Lori- I have been told by expert canners that you can re-can but you must do the process over again. I hope that helps!
I canned six quarts of tomato juice yesterday and the largest pot I had allowed me barely an inch of water to cover the jars and only about half inch to top of pot above that so it was really stressful. I was not sure if I could add more water as it evaporated (only found your page today) and checked constantly. By the time I had finished the water was barely covering the tops of the jars, one had tilted slightly on the rack and a part of rim was just at water level. I made sure that the water continued to boil throughout. Do you think it will be okay or do I need to reprocess in case, making sure that I keep the level up above the lid by adding water as it evaporates?
To add if I reprocess will I need to transfer the juice into new jars with new seals?
Thanks so much for taking the time to put all of this out there for us. I am a newbie at this (am going to try canning for the first time this weekend!) and the step0by-step directions and printable check-list are giving me the confidence I need to move ahead.
So glad to be of help, Mary Beth! Let me know how it goes!
Ball representatives say that that it no longer necessary to heat the lid flats before use. Omits a step and frees up space on the stovetop.
I canned tomatoes today in Ball jars. I processed them in my large canning pot in boiling water, making sure the water was constantly boiling, for longer than the recommended time. I let them cool in the same pot, and after an hour I removed them. All the jars had taken on water, which had settled in the bottom of the jars. I’m assuming they failed to seal and will all need to be refrigerated. Will the tomatoes still be safe and usable?